Creating XCFramework from Swift Package
In this post I will describe how you can create the binary version of your swift package. Let’s explain the use case. Why we want to create binary version of a swift package? Imagine you have a big codebase that consists of many modules implemented as swift packages. You can seperate the app into domains and use precompiled versions of them to speed up compile times. For example you have SearchModule and CheckoutModule. One team works on SearchModule and another works on CheckoutModule. There is no need to recompile SearchModule from source when working on CheckoutModule. It can be imprted as XCFramework.
Another use case maybe you have many third party dependencies that are compiled from source and you want to use precompiled version of them. I mean there is no point of recompiling Alamofire everytime you make clean build. Right?
Speaking of Alamofire let’s use it as example for our tutorial here. First go clone Alamofire from its [source](https://github.com/Alamofire/Alamofire) to your local drive then cd into the directory that you cloned in terminal.
Then get rid of .xcodeproj and .xcworkspace files. Enter the following commandrm -rf Alamofire.xcodeproj Alamofire.xcworkspace
Then open the Package.swift with Xcodeopen Package.swift -a Xcode
We will fix a bug that causes the build failure when we try to compile before moving on. Click the Alamofire scheme and select Edit Scheme. Uncheck the checkmark that is pointed with red in the following image and then close the Xcode.

Now back to terminal again. Enter the following command to build the alamofire for ios device.
xcodebuild -scheme Alamofire -sdk iphoneos -configuration Release ARCHS=”arm64" BUILD_DIR=”./Build”
Let’s break down the the command. -scheme Alamofire: we tell we want to build Alamofire-sdk iphoneos: We want to build for ios device-configuration Release: We want to use Release configuration when building. Remember swift packages only have two: Release and DebugARCHS=”arm64": Here we specify the architecture of the compiled library. Since most ios devices runs on arm64 we only need arm64. But you can add armv7s if you want to support older 32 bit ios devices.BUILD_DIR=”./Build”: This last command specifies that where we want to find the result of compilation.
After couple of seconds (if everything goes well) you will see build succeeded message. Now let’s open the build folder to find out what we have. Enter open Build command. You will find Release-iphoneos folder inside the Build folder. And inside the Release-iphoneos folder you will find the following:

Now we are not interested in PackageFrameworks folder. We will use other two. Alamofire.o and Alamofire.swiftmodule. The .o file is called objec file and it contains actual compiled code. The .swiftmodule folder contains the information about the what public APIs available in compiled code. In a way it is like .h file for objective-c class.
In order to create xcframework we first need to create library from object file(the .o file). Now cd into Release-iphoneos directory and enter the following command.ar -crs libAlamofire.a Alamofire.o
This will create libAlamofire.a file from Alamofire.o file.
We created a static library from swift package for only ios device. But what about ios simulator? Yes we need to repeat same steps with slightly different commands. First cd into alamofire directory again and enter the following command:
xcodebuild -scheme Alamofire -sdk iphonesimulator -configuration Release ARCHS=”x86_64 arm64" BUILD_DIR=”./Build”
It is the same command above for compiling for ios device except the sdk we specify iphonesimulator and archs as x86_64 and arm64. We specify two different archs. x86_64 is for intel macs and arm64 is for new Apple Silicon macs.
After the command executes successfully you will see Release-iphonesimulator folder created in Build folder. Now cd into Release-iphonesimulator and execute the same command to convert object file to static library.ar -crs libAlamofire.a Alamofire.o
Before creating xcframework let’s check if everything in place. Your Build folder should look like this:
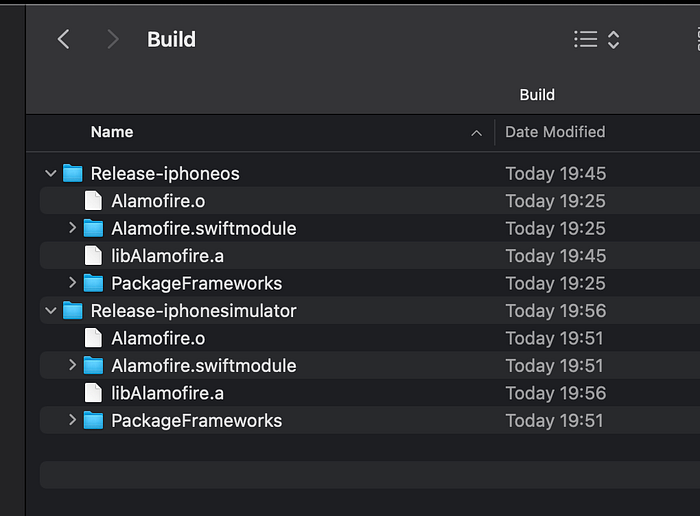
Now we are ready to combine two version of the static library into one xcframework. First cd into the Build folder. And then enter the following command:
xcodebuild -create-xcframework -library Release-iphonesimulator/libAlamofire.a -library Release-iphoneos/libAlamofire.a -allow-internal-distribution -output Alamofire.xcframework
Let’s break down the command:-create-xcframework: We tell xcodebuild that we want to create xcframework-library Release-iphonesimulator/libAlamofire.a: We specify first library path for xcframework-library Release-iphoneos/libAlamofire.a: And the second one. You can specify as many different versions of same library. For example if you have tvOS version you can specify it with another -library flag-allow-internal-distribution: Now this one needs a bit of explanation. Normally xcframework expects the library compiled with Library Evolution enabled. Enabling Library Evolution for swift makes compiled code independent from the version of the compiler that compiled it. For example if you compiled your code with swift 4 compiler you don’t need to recompile it for using with swift 5. To enable library evolution you can add BUILD_LIBRARY_FOR_DISTRIBUTION=YES option to xcodebuild command. Since we didn’t use library evolution we have to supply -allow-internal-distribution option when we create xcframework.-output Alamofire.xcframework: And in the last option we tell the output will be Alamofire.xcframework.
After this command we are done. If you open the Build folder you will find your Alamofire.xcframework. You can add it to your xcode project or create another swift package that wraps it.